Time needed: 2 minutes
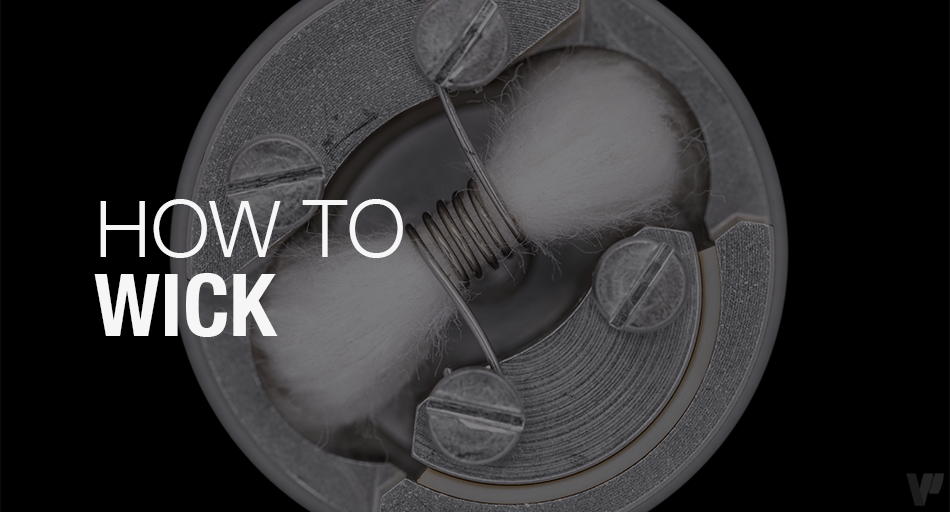
How do you fit the wick into the coil correctly?
- Cut some coil wire
Start by cutting a piece of coil wire, not too short and not too long. Practice this a few times as it gets easier the more you do it.
- Wrap the wire around your pin
Wind the piece of wire around the pin to create the coil diameter you want. You want to wind it 3 to 6 times around the pin.
- Fit the coil
Fit the coil onto the plate in your vape device.
- Insert the wick
Slide the wick into the centre of your coil.
- Moisten the wick
Pour a few drops of e-liquid onto the wick so it settles into its final position, and you avoid a potential dry hit.
- Vape
Close your clearomizer, dripper or atomizer and test your assembly.
Substantial savings on your resistance coil budget
One of the easiest money-saving tips consists of making your own resistance coils. Indeed, the resistance coils that generally go with clearomizers can easily cost between 1$ and 4$ per unit. Given that you need to change your resistance coils regularly when they are clogged up, so as not to affect the taste of your e-cigarette e-liquids, and also to limit the unnecessary production of potentially toxic substances, your vaping budget can soon increase every week. Here is how to make you own resistance coils.
First of all, you need a rebuildable atomizer. Indeed, this type of atomizer allows you to change the resistance coil as you see fit. However, there is a learning curve with this type of gear. It’s not complicated by any means, but, using trial and error, you should manage it over time. The principle is based on two parameters: the resistance wire and the wick.
Resistance wire and cotton wick
Without going into detail, the most commonly used resistance wire would be Kanthal. Other types of metal can be used, particularly for temperature control. However, we will get back to that in a future article.
To make your resistance coil, you will need some cutting pliers and a shaft of about 2 mm (such as a screwdriver for example, or “coilers”, which are shafts designed specifically for vaping). By winding the resistance wire around the shaft, you will create a coil consisting of around 3 to 6 windings according to the desired ohm value and the thickness of your wire. The steps are as follows:
- Cut a piece of resistance wire
- Wind it around a shaft to form between 3 and 6 windings
- Attach your winding to the mounting plate of your atomizer
- Insert the cotton wick in the centre of the winding
- Moisten the cotton wick with a few drops of e-liquids
- Close and fill your atomizer
For the wick, cotton is mainly used. Take care not to use the cotton that you usually find in makeup removal products. It is preferable to source this cotton in specialist e-cigarette stores. The more absorbent the cotton, the better the vaping experience will be. Once again, you will need to change your resistance coil or your cotton wick quite regularly to obtain consistent vaping quality. You will note that some e-liquids clog resistance coils up more than others. It’s up to you to adjust the flavour concentration if you make your own liquids (DIY), or to select products that meet your quality requirements. As a general rule, the sweeter the liquid, the more it will tend to clog up the resistance coil.
You can decide to make your own resistance coils for more than just budget reasons. The enjoyment you get out of making your set-ups allows you to tailor your vaping experience to your exact needs and produce unique sensations.
The choice is yours!


